
DeepVocal Voicebank Creation Tutorial - Installing Programs
In order to start making a DeepVocal voicebank, you need 2 (deepvocal-related) programs. DeepVocal (DV), and DeepVocal ToolBox (DVTB). DV is for using/testing voicebanks, DVTB is for making and configuring them. They are only available on Windows.
Both of these programs can be found on DeepVocal’s homepage.
Additionally (while not technically necessary), I strongly recommend using RecStar to record the audio files, following the reclist. This can be downloaded off of RecStar’s GitHub page.
Note: All of these instructions assume that you’re on Windows, since that’s the only platform that DV and DVTB can run on. To install RecStar on other platforms, consult its documentation.
DeepVocal Installation
- Select “Download” from the website’s homepage, then click the download button under “DeepVocal Editor”
- Extract
Setup_DeepVocal_beta_2.1.0.zipand runSetup_DeepVocal_beta_2.1.0.exe - Follow the installer’s directions. This tutorial assumes that it is installed in the default location (
C:\Program Files (x86)\DeepVocal), but if needed you can change it. - If the DeepVocal editor opened on its own, close it. To change the default language from Chinese to English, go to
C:\Program Files (x86)\DeepVocal\configin the file explorer and openapp.cfgin a text editor (I use Notepad++, but Windows Notepad will work fine). This is basically the application’s persistent settings page. Edit the line that starts with"langFilePath"to say"langFilePath" : "C:\\Program Files (x86)\\DeepVocal\\language\\English.txt"(or change the path to the correct path, if you installed somewhere else). Make sure to save the file, then you can open DeepVocal and verify that the language is set correctly. This can also be done by runningDeepVocal.exeas administrator and changing it through the GUI (首选项(Preferences) ->语言设定(language)...(Language)->English->确定(Confirm)), then restart the program (doesn’t need to be run as administrator) - Done! You can now close the DeepVocal editor.
DeepVocal ToolBox Installation
- Select “Download” from the website’s homepage, then click the download button under the “DeepVocal ToolBox”
- Extract
Setup_DeepVocalToolBox_beta_2.1.0.zipand runSetup_DeepVocalToolBox_beta_2.1.0.zip - Follow the installer’s directions. This tutorial assumes that it is installed in the default location (
C:\Program Files (x86)\DeepVocalToolBox), but if needed you can change it. - The software will open by default. It will be a single bar with some options. You can ignore it for now since there are no changes that need to be made (from what I can tell, English is the only language option).
- Done! You can now close the DeepVocal ToolBox.
RecStar Installation
- On RecStar’s GitHub page, select the “releases” tab (on the right side)
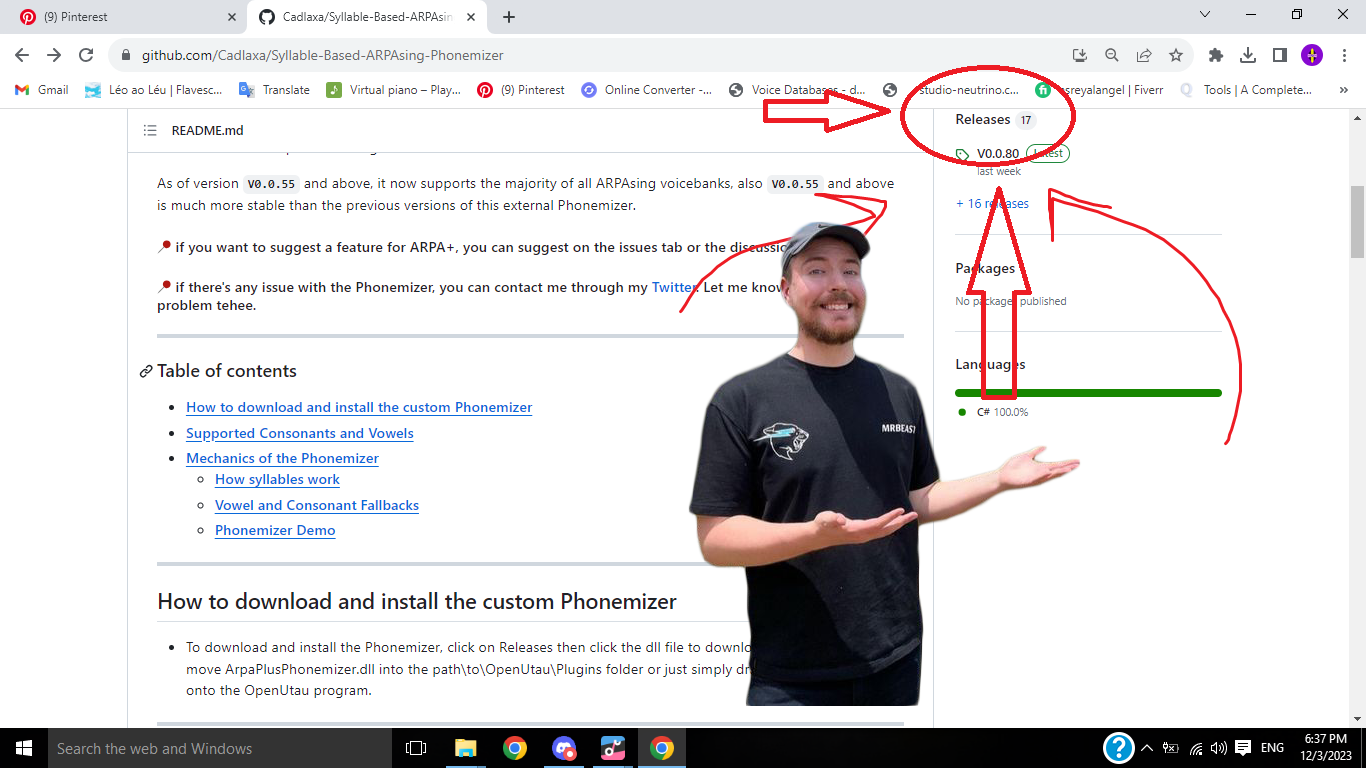 (handy diagram)
 - Under the release labelled
Latest, click and downloadrecstar-x.x.x-win-64.zipfrom its Assets - Extract
recstar-x.x.x-win64.zip, then move therecstar-x.x.x-win64folder to somewhere memorable, such as the desktop. - Open the folder and run
RecStar.exe. - Since this is a portable application, you will not need to do any installation. All recordings, however, are saved in
C:\Users\[User]\RecStar\sessions\[reclist name][date and time]. - Done! You can close the program.
Now you’ve installed everything you need!
Next Step: Recording